Self-Hosted Azure DevOps Agents with Azure AD: Skip the PAT Tokens
Personal Access Tokens are a pain to manage. Here's how to authenticate your Azure DevOps self-hosted agent pool using an Azure AD Service Principal — no PAT rotation required.

Lee Beenen
Cloud Developer

If you're someone who runs any number of Azure Pipelines a day, at one point you might have considered running a self hosted agent pool.
Maybe you wanted to isolate your workload from the rest of your organization as you are getting sick of pipeline build queues filling up right when you are planning a very important release to production. Maybe you have very specific needs in terms of OS, tooling, whatever.
It doesn't really matter why, you (like me) probably had second thoughts when you saw that the recommended way of getting a Self Hosted Agent to connect with your Azure Devops organization is by using a Personal Access Tokens (PAT).
PAT's might be very easy to create, but in my experience, they are a pain to manage. Rotating a PAT doesn't take long (but cannot trivialy be automatically rotated in a non-interactive setting), but they are bound to a single person, making them unreliable to use in any business-critical applications. Also, if you scope them correctly you end up having a lot of them, making a small amount of manual work become an error-prone and tedious operation, making it very attractive to just have a single PAT that is way overprovisioned for what it was actually meant to do.
Luckily, there's another way. Since late March, Microsoft has made it possible for organizations that use Azure AD (soon to be renamed to Microsoft Entra ID, for reasons still unclear to me and everyone else) to use App Registrations and their resulting Service Principals to create Azure AD Access Tokens that can be used in place of PAT's.
Sounds great! How though? Well that's what we're here for, so let's get going.
Setting things up
What you're going to need is:
An Azure subscription with Azure AD enabled
An Azure Devops (ADO) organization that is connected to a Directory inside aforementioned Azure Subscription
A project inside said ADO organization in which you're permitted to create new Self Hosted Agent Pools and set Organization Level User Permissions.
Something to run a Self Hosted agent on. For more inspiration, check out this article
Pro tip: If you're planning on running a Self Hosted Agent on a Debian VM, I've found it way easier to just run the agent as a docker/podman container instead of getting the Linux agent software working. There seems to be some unsolved bug in there that causes the agent not to be able to connect to Azure Devops, which is quite a limitation(!).
Creating the App registration
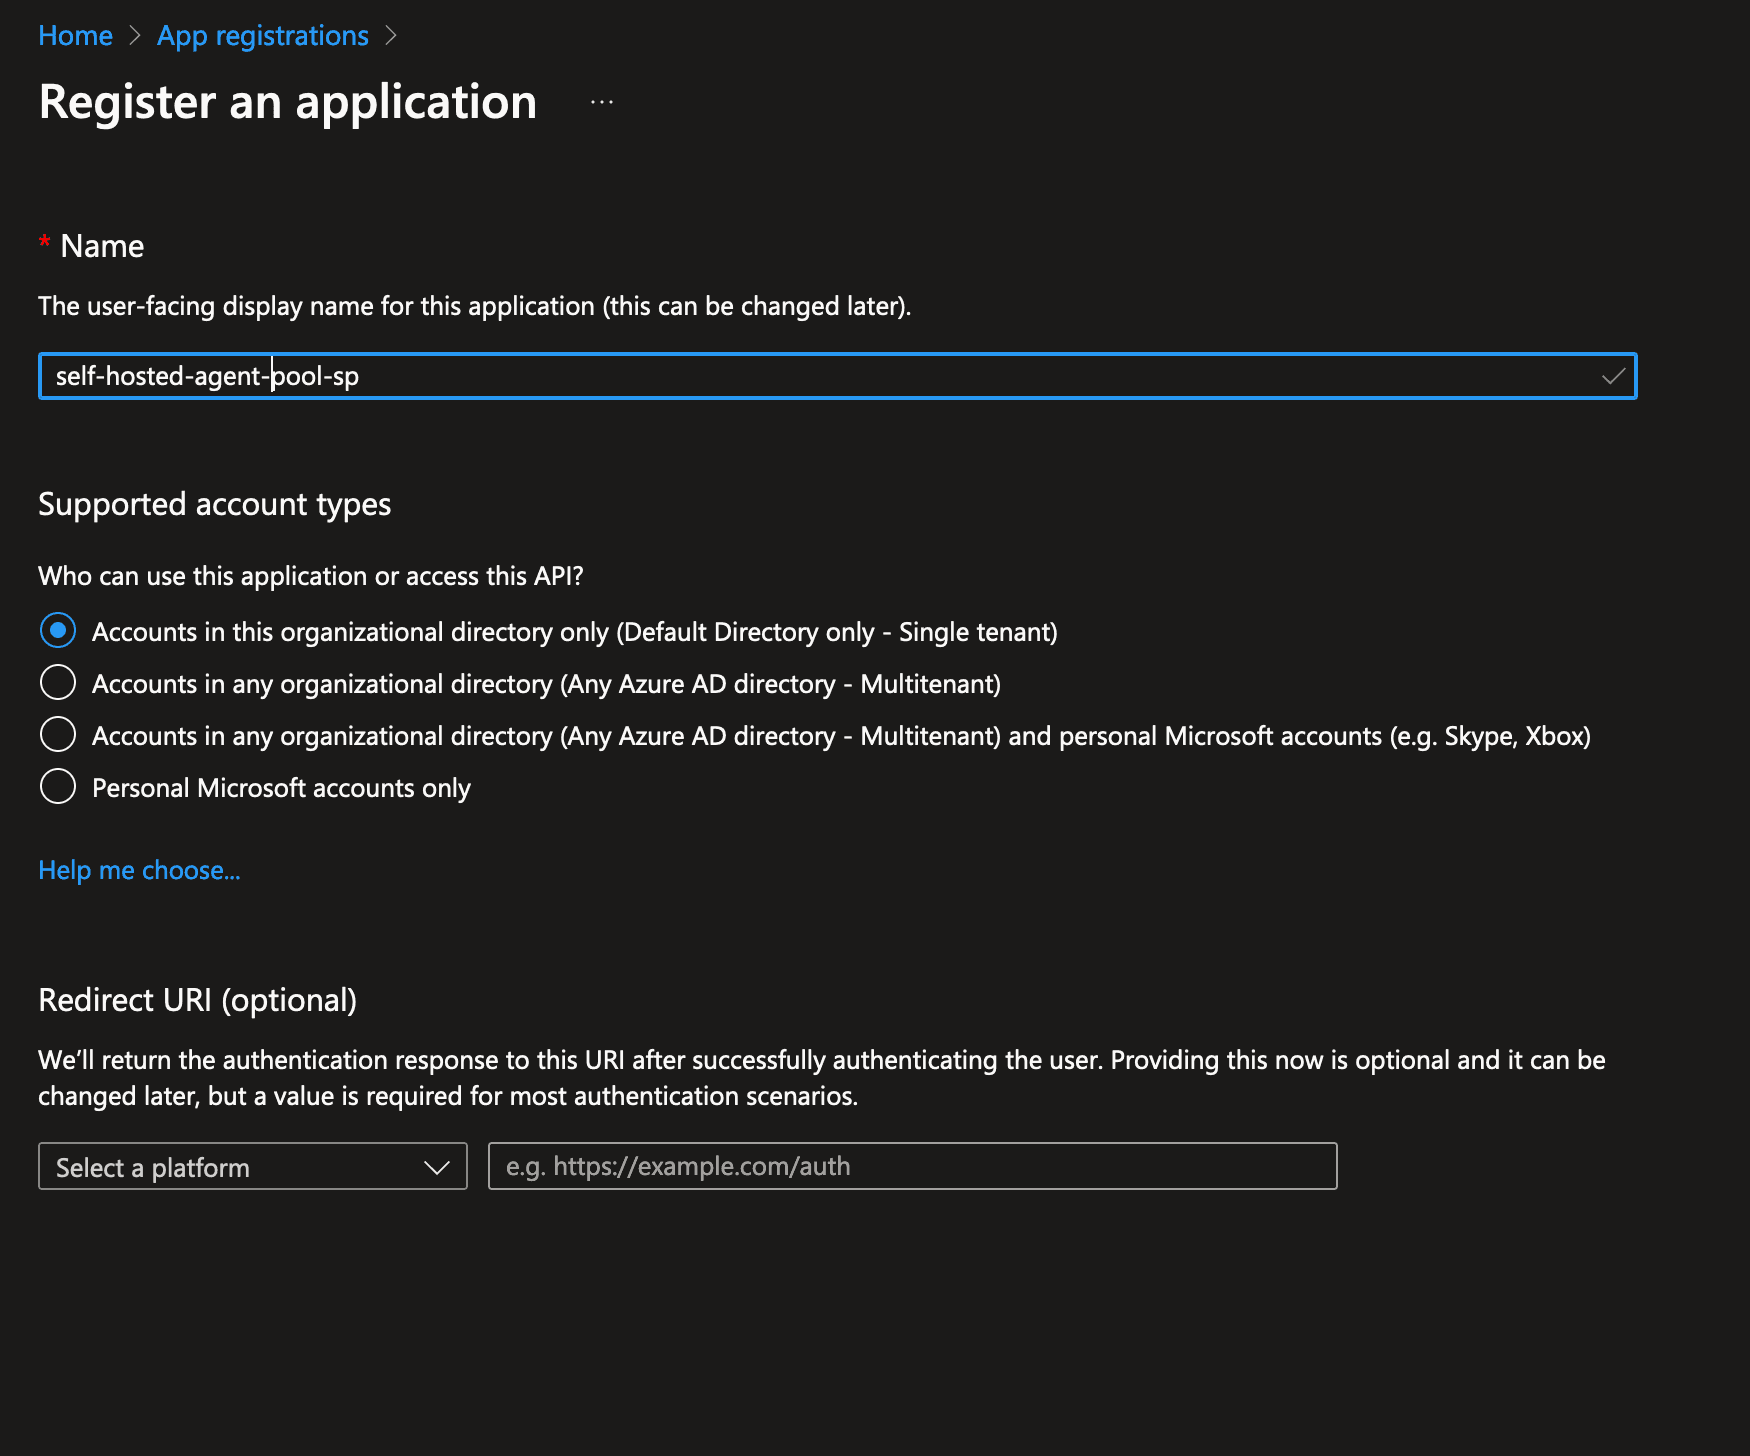
First up, as mentioned before, we're going to need an Azure environment that has Azure AD enabled. Log into your portal and head to "App Registrations". Register a new app, and give it a fitting name. I named mine "self-hosted-agent-pool-sp".
Note: You're also going to have to set up either a Client Certificate or Client Secret for this App Registration. This will allow us to log into the Service Principal either through the Azure CLI, or use the Service Principal through an Azure Devops Service Connection for automation purposes. It's often easiest to get started with a Client Secret, but discussing the pro's and con's of Cert vs Secret falls outside of the scope of this blog.
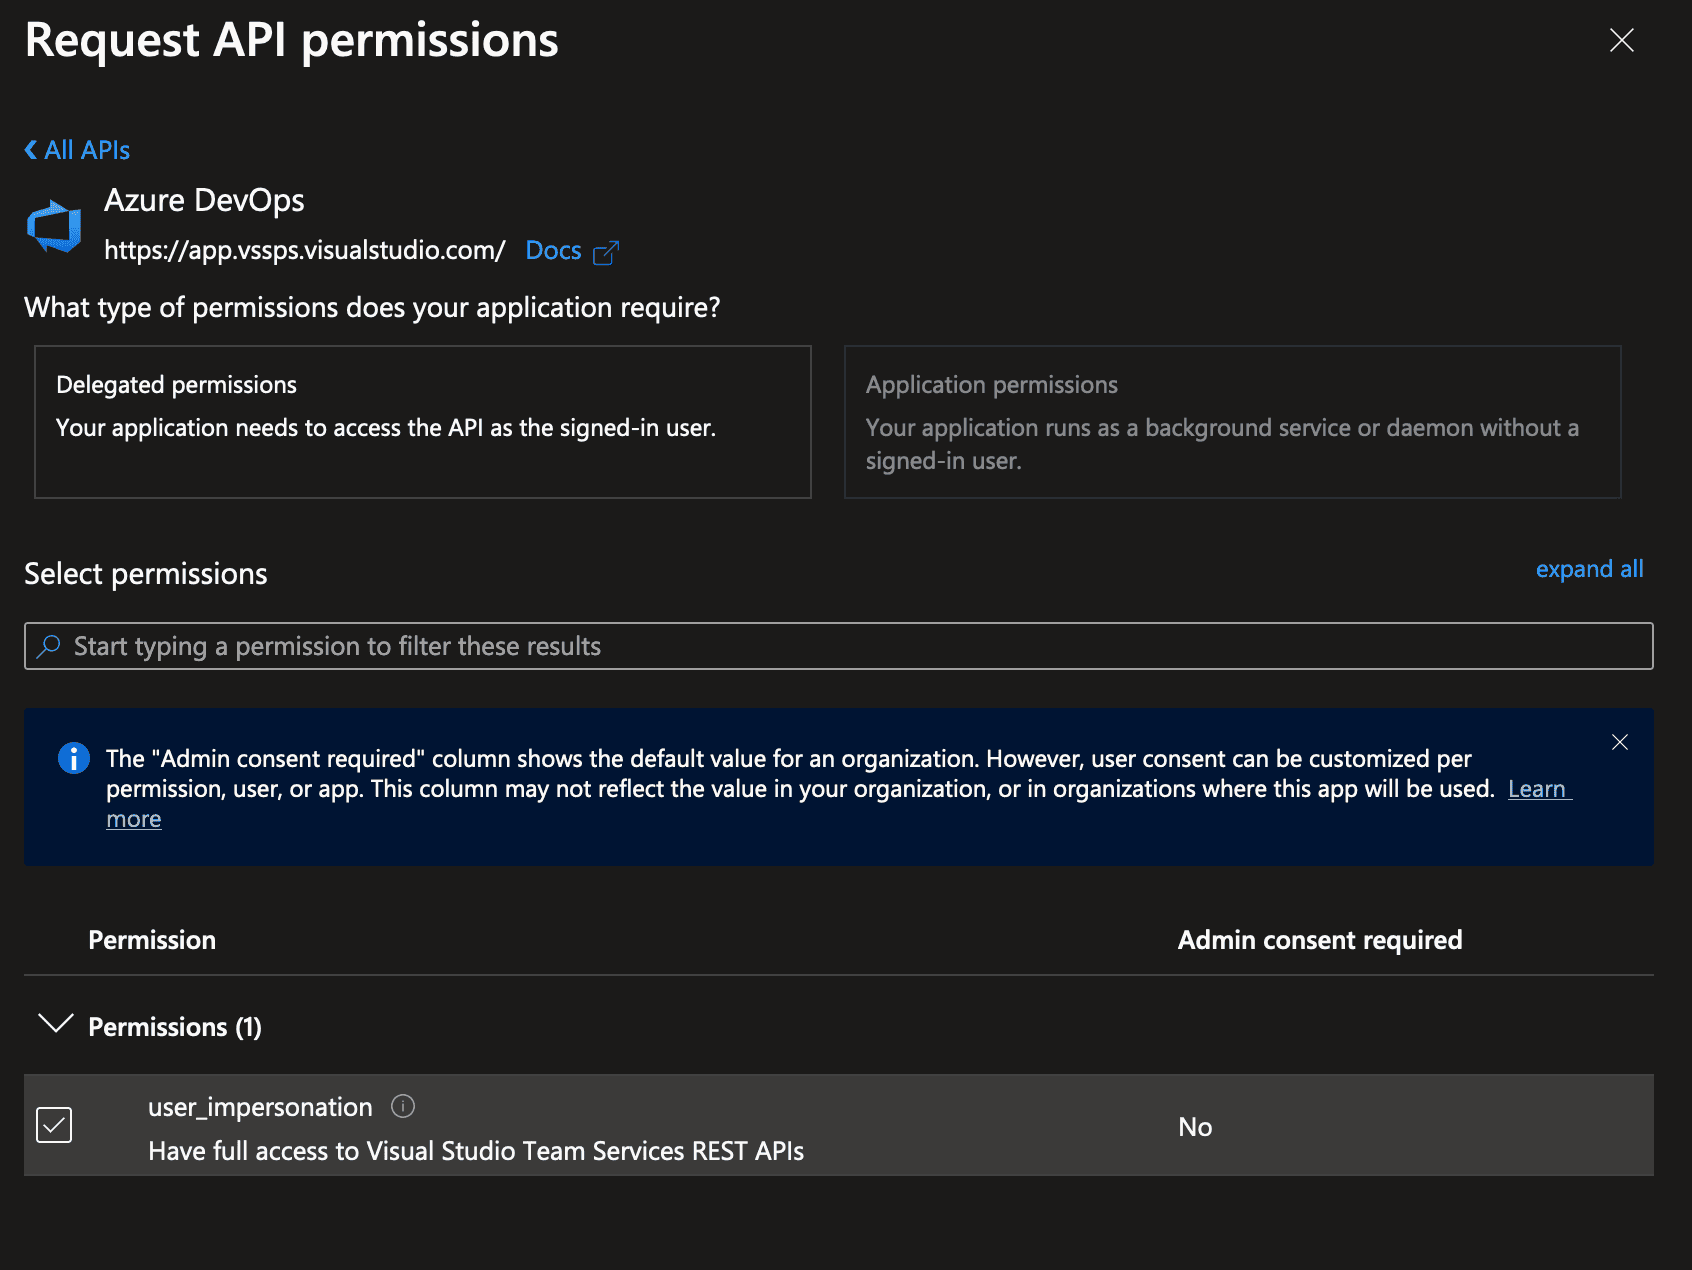
Next up, go to API Permissions and add the Azure Devops user_impersonation Delegated permission. This will allow the Service Principal to call the Azure Devops REST API, which is what the Agent software is doing when registering itself as a new agent inside a given agent pool.
Afterwards, we need to assign a role to this app registration so that it is bound to a specific subscription. Go to your given subscription and go to Identitiy and Access Management (IAM) in the blade on your left. We're going to add a new Role Assignment, so follow the given dialogue and make sure that you're setting our new SP to the "Reader" role.

If you forgot to do this, during login you'll get the error No subscriptions found for {ClientID}, hopefully pointing you towards fixing this by following the above.
Of course, just giving the Service Principal permission to call the ADO API is not enough to do what we want to do here, we also have to give the SP the right permissions inside ADO.
Assigning permissions in Azure DevOps
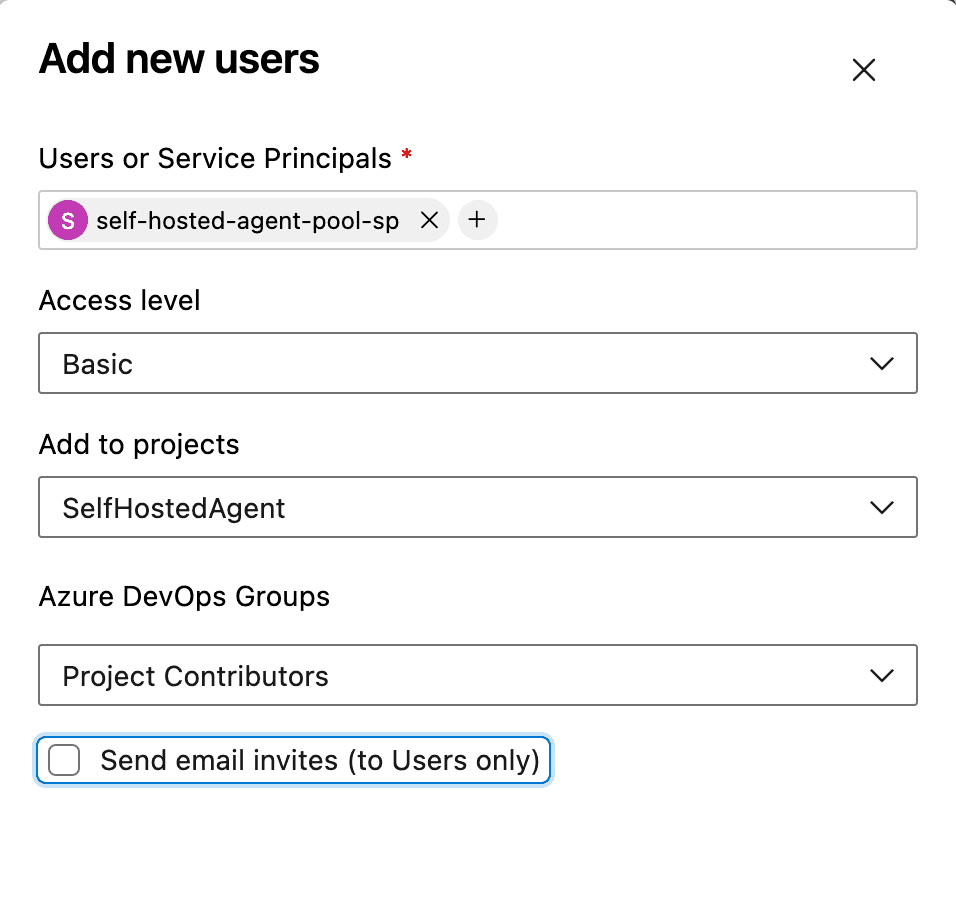
First of all, navigate to the Users tab for your organization and add the service principal as a user with Basic permissions. We're going to make it a Project Contributor on the Azure Devops Project I've created earlier, conveniently named "SelfHostedAgent".
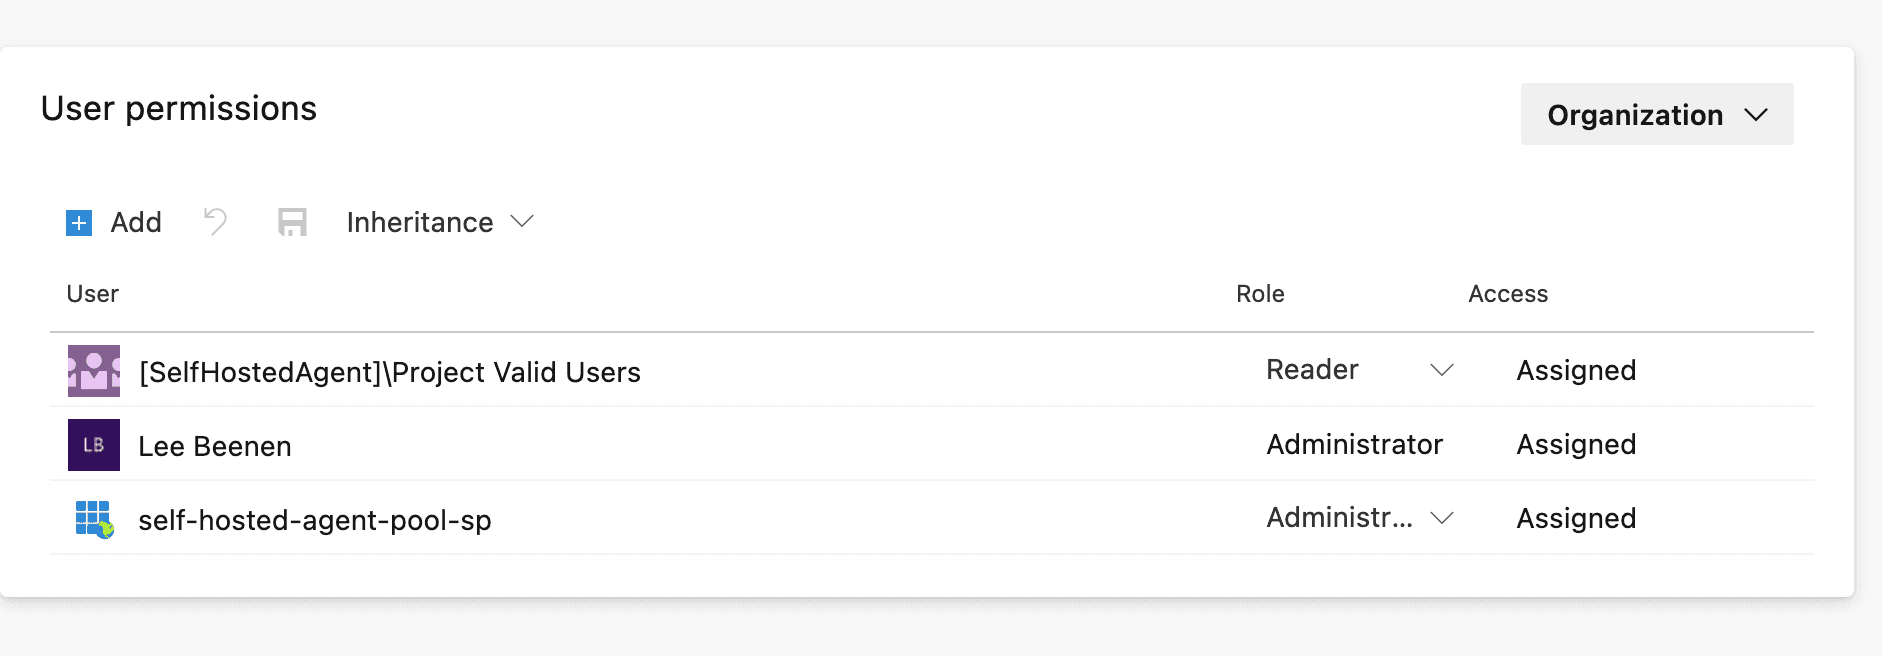
Next up, we're going to navigate to the Agent Pool we've already created and make sure that the Service Principal (which is now treated the same as an ADO user) can actually Read & Manage the agent pool. For this, we need to add the User Permissions at the Organization Level and add our Service Principal as an Administrator.
Why at the Organization level? If you set the Service Principal as an Administrator at the Project level, the agent will start up but it will give you an error message that somewhat resembles {Service Principal} needs Manage permissions for pool {Pool Name} to perform the action and then just error out. This probably has something to do with the fact that Agent Pools are actually an organization-level construct in ADO that are just shared between different projects based on permissions.
After this you should be set! To be sure, let's just run a little script to make sure that we've got the basics down so far.
As you can probably tell, the above makes some assumptions. For example, that you've got the Azure CLI installed, as well as curl and jq. These are pretty safe bets, as the best way to run the above is to just run it in an Azure Pipeline:
It's easiest to set up the Service Connection (that will be passed to the azureSubscription input above) manually. Navigate to the project settings inside Azure Devops, create a new service connection (Azure Resource Manager -> Service Principal (Manual) and then fill in the ClientID, TenantID and either the Client Secret or the Client cert depending on what you set up earlier).
Right now, this'll output an empty array, as we've not added any agents to this new agent pool yet (or maybe you did, I don't wanna make too many assumptions).
Finishing up
So what's next? Well, we retrieve an Azure AD access token, and pass that along in place of the PAT, and we're set!
One point of note, the Microsoft documentation (at this time of writing, I've sent them a note) is a little inconsistent as how to actually do this. At first, it refers to this article which led me to think it was as easy as doing a straightforward curl request. It actually turned out to be that easy, but the access_token that this produced (which was also a valid JWT, leading me to believe I was on the right track) turned out to not be the right thing at all!
Passing it along as a bearer token to the earlier bash script results in a frustrating 301 that redirects you to a 401, giving you no further information as to what, if anything, you did wrong.
Well you're in luck, I'm going to spill the beans on how to avoid making this mistake and wasting an afternoon: Just keep reading the article, and use the az account get-access-token method from the actual example instead of curl'ing the oauth2 endpoint.
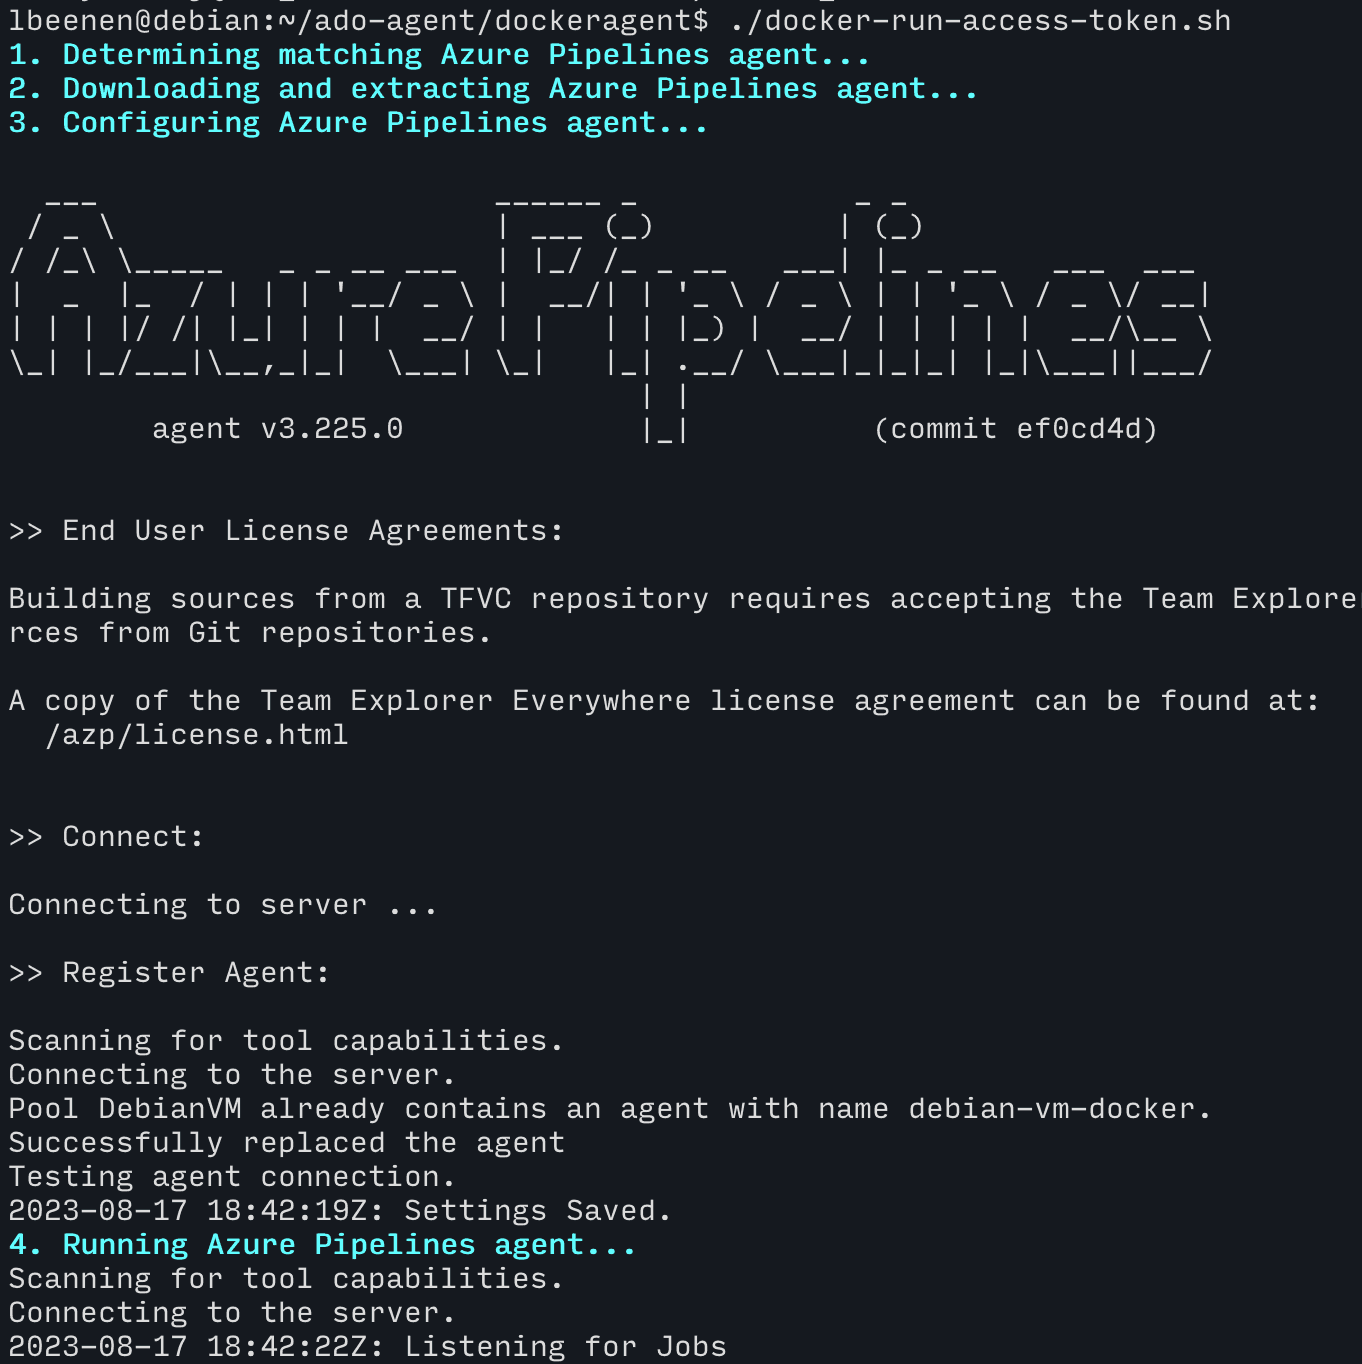
If you pass along the accessToken that results from this call and expose it as the AZP_TOKEN to the agent you should roughly see something like this:
Automating it
Great! But let's not ClickOps our way through this. I cooked up a bit of Terraform that helps you automate this.
You'll still have to create at least one App Registration to let Terraform do what it needs to do, refer to the README for more details.